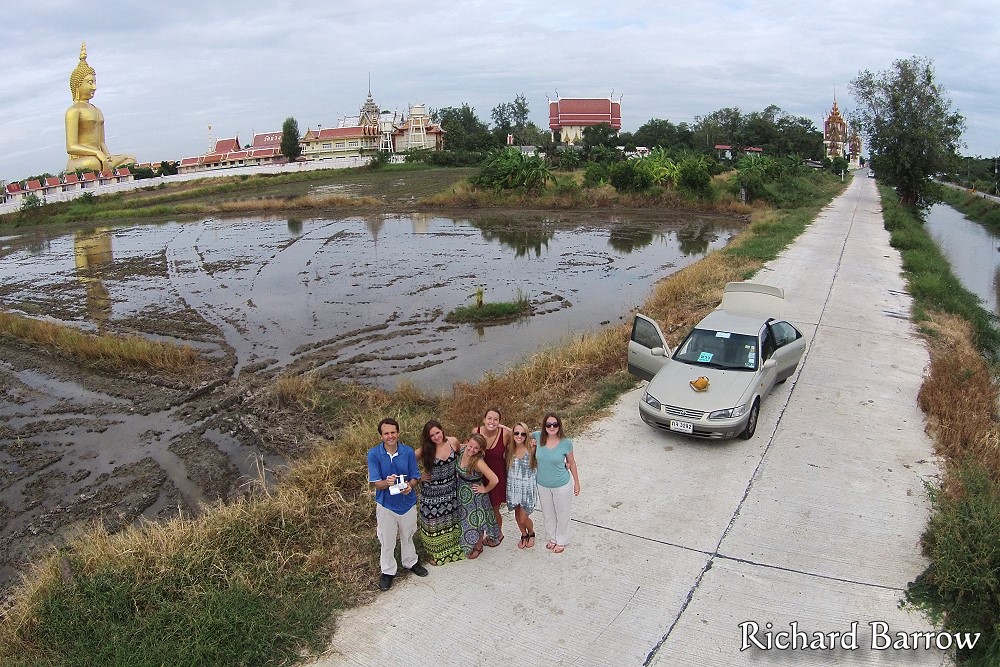
My first flight in Thailand with a Phantom 2 Vision Quadcopter – 22nd November 2013
For quite a few years now I have been wanting to buy some kind of unmanned aerial vehicle (UAV) in order to take pictures and videos from high up. But, up until recently, they have been both expensive and difficult to maintain. The new generation of quadcopters have changed all of that making the drones more affordable for the average person. After doing some research and talking to some people, I decided to go for the DJI Phantom Aerial UAV Drone Quadcopter. Everyone was saying that the Phantom is much easier to use than other drones and so ideal for novices like myself. However, while researching where to buy, I found out that the DJI Phantom 2 Vision Quadcopter had just come out.
For Phantom 1 you need to attach a GoPro (not included). However, the Phantom 2 comes with it’s own mounted 14MP camera with 1080p HD video recording on a micro SD card. Usually it’s not a good idea to buy a drone with it’s own camera, but the reviews I saw on the Internet last week looked good. But, what swayed me to buy the Phantom 2 instead of the older model is that the battery life has now been extended to 25 minutes AND the pictures are live-streamed to your smartphone. So you can control tilt and pan, exposures and also take pictures or video.
I first looked into buying in Singapore as I have a friend coming to visit soon. But then I found a shop in Bangkok called Hobby Thai that stocked a wide range of drones including the latest Phantom. They had reduced the first Phantom down to 15,800 Baht and the new one that I just bought is being sold at 38,400 Baht. That is $1,206. If you check amazon, their full price is $1,399 and reduced price is $1,208. So, slightly cheaper here in Thailand. I haven’t found any other outlet in Thailand selling the Phantom 2 yet, but you might be able to find it cheaper elsewhere.
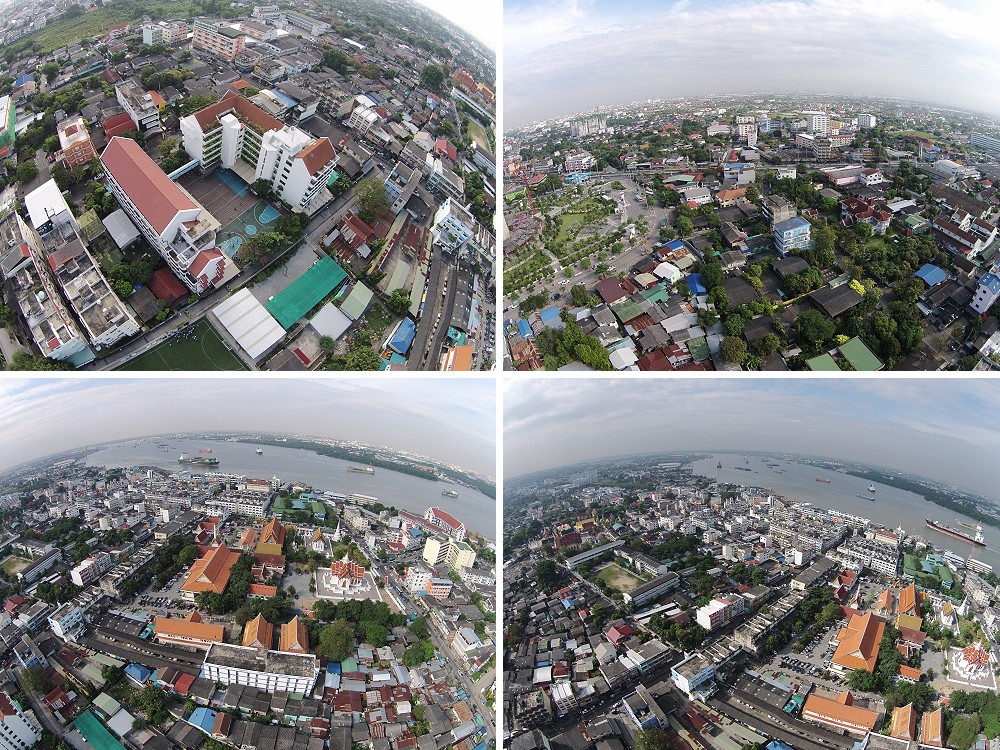
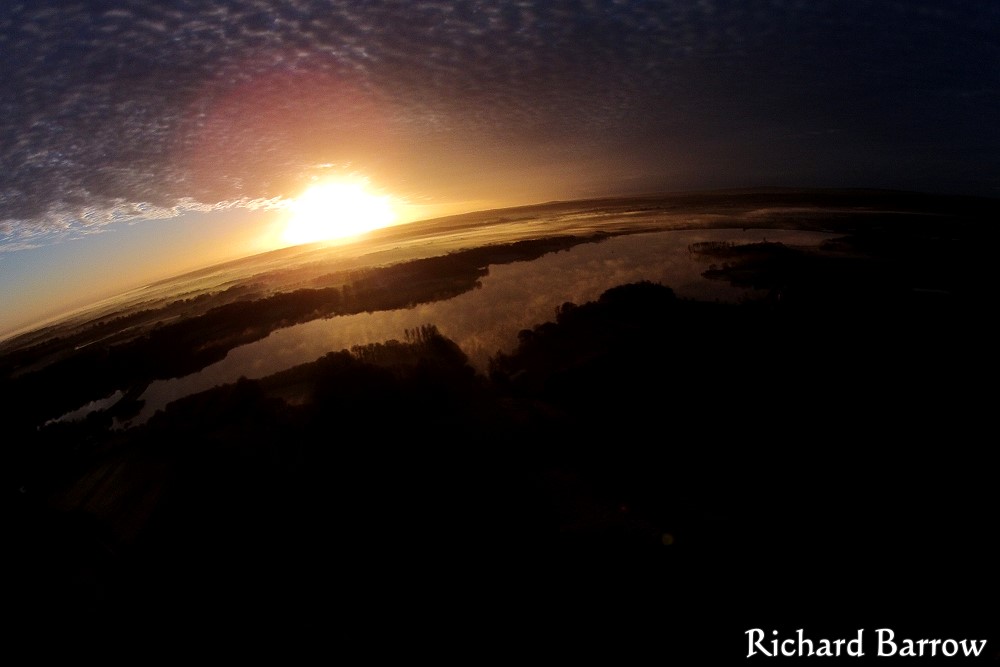
I bought the quadcopter last night and charged the batteries as soon as I got home. One for the quadcopter and one for the WiFi extender. The remote control takes normal AA batteries. It only took an hour or so to charge the big quadcopter battery and a bit longer for the WiFi extender. This morning I took the quadcopter out of the box, put on the props, turned everything on, connected my smartphone WiFi to the quadcopters hotspot and then flew it. This was my first ever flight of anything like this. These are also pictures of my first flight. I then tweeted the pictures a few minutes later from the location using the hashtag #ThaiDrone.
My Experience of Flying a Phantom Vision Drone – 8 January 2014
It has been nearly two months now since I bought a DJI Phantom 2 Vision Quadcopter in Thailand. I was very busy during the first month and so I didn’t really get much chance to fly it. But I have been away on holiday in the UK over the last few weeks and so had more time to practice flying. It’s certainly an easy drone to fly, even for a beginner like myself. I was flying it almost straight out of the box without even reading the manual properly. I didn’t crash it that first day, but a few crashes later persuaded me that I should take a step back and learn how to fly it properly.
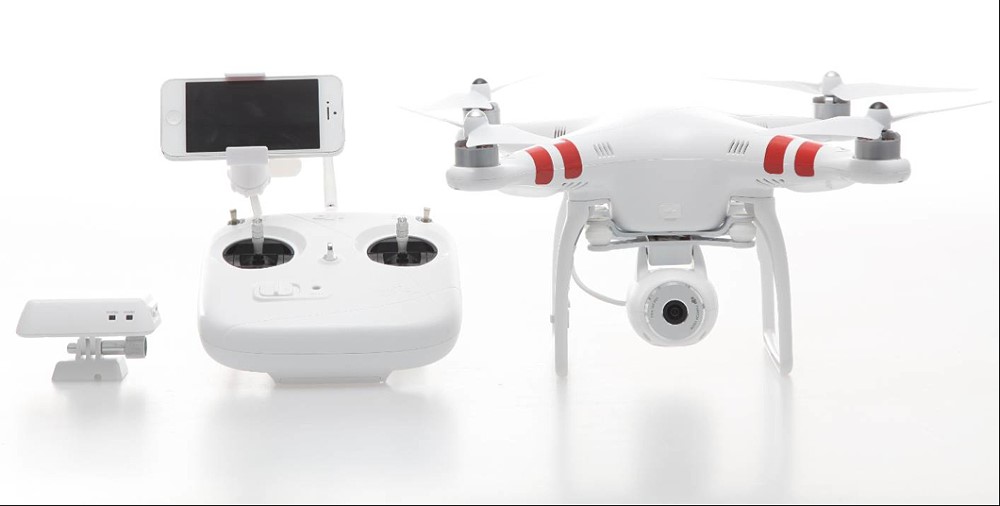
Specifications from the manufacture:
- Integrated 14MP camera with 1080p HD video recording on a micro SD card and live first-person view (FPV) Wi-Fi streaming of video and telemetry to the free Vision app for iOS or Android
- Included Wi-Fi extender allows live remote video streaming from up to 980 feet away
- The integrated camera tilt motor will automatically compensate for the Phantom’s single-axis motion by tilting the camera for smoother video, and it’s manually controllable via the Vision app
- Fly up to 25 minutes on a single charge using the included 5,200-mAh lithium polymer (LiPo) battery that’s easily removable and contains intelligent circuitry and a charge-remaining indicator built-in
- The Phantom 2 Vision also includes all the features you love from the original Phantom, with an included camera instead of a GoPro mount
When you first come to fly the Phantom, it is highly recommended that you do so in an open area such as a field or a park. Certainly not near any trees or buildings. It should also be a relatively calm day with no gusts of wind. Later, once you have enough experience, you should be able to launch and land the drone near trees even in windy conditions. It should also be noted that the blades on this drone can seriously hurt or even kill someone if it hits them in the face or drops out of the sky. So, make sure you get flying experience before flying near crowds.
When you fly the drone for the first time you have to calibrate the compass which is quite simple. You shouldn’t need to do it again. When you are ready to fly there are four devices you have to power up and connect. The remote controller and the WiFi Extender, the drone itself and of course your smartphone. It will take a minute or so to connect them to the same WiFi network and also for the drone to connect with satellites overhead. Don’t rush this. Take the time to make sure everything is working fine and that the camera can tilt up and down. Once you get the green lights on the drone you are good to go.
In preference you need to have a flat service in order to send the drone up and down safely. You can do this on a field with short grass. But a few times the drone has tilted backwards and the blades dug into the ground which brought it to an automatic stop. To overcome this, you can use a flat board to put on the ground like a helipad. This will make it easier for landing too if the grass is long or wet. Alternatively, you can just get someone to help launch the drone. All they need to do is hold it above their head and release as it starts to rise. And when it comes back down they can just catch it. Just tell them not to lower it until the propellers have stopped spinning!
One of the first things that I did was to see how far it could fly. You definitely need to do this in an open area until you gain more confidence. The height the drone will fly depends a lot on atmospheric conditions. Some of my early flights were only 140 meters straight up. But I have also done 280 meters. If you are starting to go out of range you will get a warning on your smartphone. You can choose to ignore this but you should now proceed with caution. However, once it does fly out of range, all is not lost. As long as you got the green light before take off, the drone will now automatically head for home.
The satellites that it uses to do this are not military grade and so it won’t come back to exactly the same spot. Which is why you need to practice first in an open field until you gain competence. You don’t actually need to wait for the drone to return all the way home as you can flick the S1 switch on the remote controller to regain control as soon as it comes back in range. You can then, in theory, send it back up again to take some more pictures and video. I think it is a good tip that if you are going to send it up really high, that it goes straight above your head. You don’t won’t a tree or building between you and the drone if it is returning home.
The battery in Phantom 1 lasted only 10 minutes. With this new drone it can go up until 25 minutes. However, you do need to be careful once it starts to go below 30% as it might start to drift more than normal. This is when you need flying experience to bring it down safely. Another problem I have had a couple of times is when the drone lost touch with the satellites. It uses these to hover. If you lose satellite coverage then it will drift. This happened to me on an early flight and I panicked and tried to fly it left instead of right and it crashed into a building and fell 15 meters to the ground. Luckily the repairs weren’t that expensive. About 900 Baht for a receiver and 500 Baht for the labour.
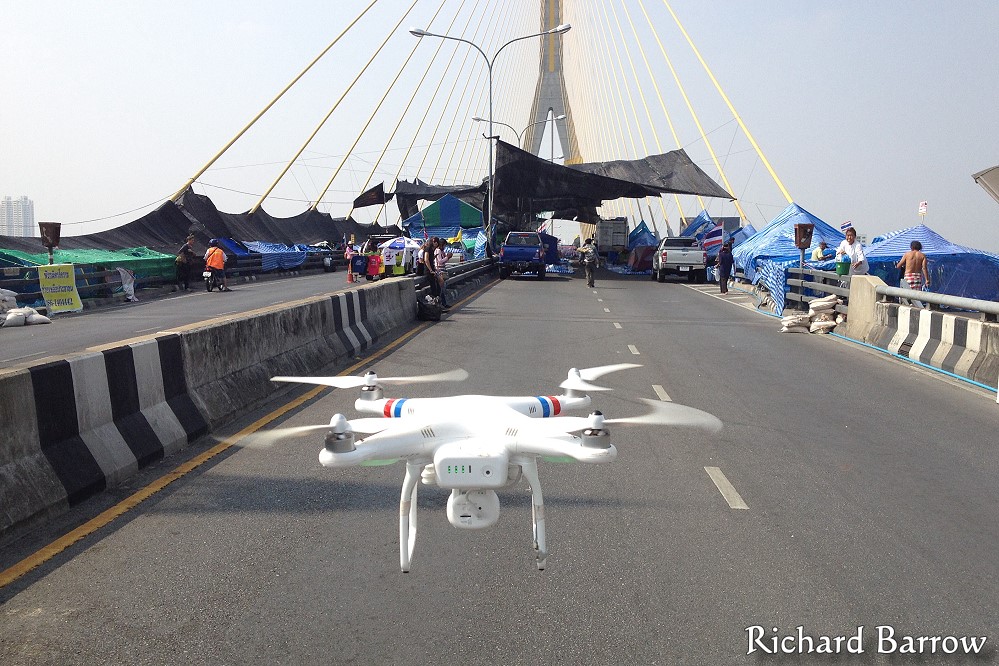
I don’t have any experience of flying any other drones so I cannot do any comparisons for you. But, I will tell you a few things that I found cool. Firstly, it is very easy to fly the drone and then take your hands off the controls to concentrate on the smartphone. In theory it will just hover in the same place. But a gust of wind might blow it away so do keep one eye on it. The next coolest thing is that the pictures from the camera on the drone are streamed live to your smartphone. There is no noticeable time lag. So, when you see a great shot you just hit the shutter button or take a video. You use the remote controller to pan left and right and the smartphone to tilt up and down.
The remote controller, which can hang around your neck, also has a clip for your smartphone. However, a second person could hold this in their hand to take the pictures while you fly the drone. I have also used an iPad this way. However, you have to stick to each other like glue otherwise you will lose the connection. But the connection between the remote controller and the droid can go as far as 300 meters thanks to the WiFi Repeater. The smartphone app allows you to do many things including changing exposure, white balance, ISO setting or even switch between JPEG and RAW.
The smartphone app also gives you real time flight data such as altitude, distance and flight speed. There is also a cool flight radar which is really handy if you lose sight of the drone. I have panicked a few times when It had gone so high I couldn’t find it straight away. The radar tells you in which direction the drone is and how far away. The radar also tells you which way it is facing which is useful when it comes to turning it different directions. Another cool thing, though I haven’t actually done this yet, is to post the pictures onto social media from within the app while you are still flying. However, to do this, you need to disconnect your WiFi & change to 3G. You can still fly the drone, you just won’t be able to see any live pictures.
From experience now, I find it useful to bring the drone back down to check the pictures before moving onto another location. It is possible you might see something on the bigger screen that you hadn’t spotted before on the small iPhone screen and want to send it up again. So, what I do is take the micro memory card out of the camera, insert it into a card reader for my iPad and transfer it across. I can then get to see much larger pictures in which to check if I need to take any more. If need be, I can then send pictures from my iPad onto social media only a few minutes after the drone has landed. If you don’t have a connector, you can use WiFi between the drone and your iPhone/iPad to transfer the pictures. But, this will take longer.
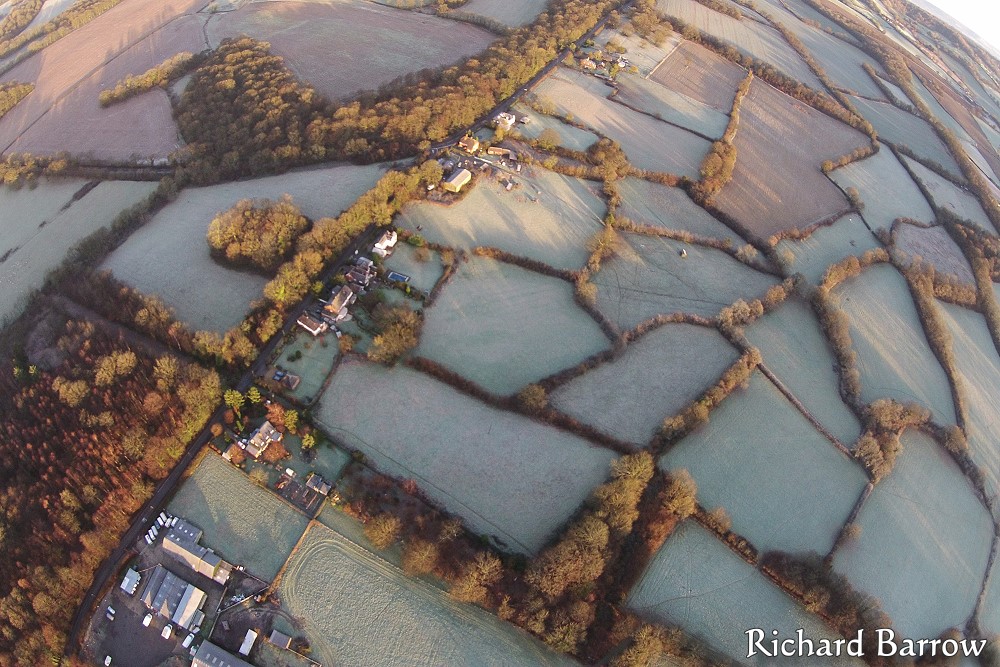
Overall, I am very happy with this drone. I am really glad this came out at the same time as I was nearly about to buy the Phantom 1. The extra battery length is really beneficial, plus being able to see and control the live pictures from the drone’s camera is great. However, one advantage of Phantom 1 is that you can use a GoPro camera. And once a new GoPro comes out, you can just switch to the latest version for better quality. That is something you cannot do with a camera that is built in. Having said that, the quality is just fine from what I have seen so far. Of course, it is not up to the quality of a DSLR camera, but it is good enough for what I am using it for.
Ever since I started posting my drone pictures on social media, on Twitter using@RichardBarrow and the hashtag #ThaiDrone and on my personal Facebook Profile, there has been a lot of comments from people who said that they are keen to buy this toy. But, that’s the problem. It’s not really a toy. Or, if it is, it’s an expensive one. You might find it fun to start with by taking pictures around your house and that of your friends, but how soon before you get bored with that? For myself, it has opened up a whole new area of interest. I am now revisiting tourists attractions around the country and documenting them on my new website Thailand from Above.
For those who are interested, I bought the drone at Hobby Thai in Ramkhamhaeng in Bangkok. They also do repairs which can be handy. It cost me 38,400 Baht which is comparable to the price on amazon.com. There are probably other places in Bangkok that also sell them so shop around first. I have heard that there will be an update to the app soon that will allow you to plot your route in advance on a map. As the camera can easily detach, it might also be possible in the future to upgrade the camera or change it to a different kind of payload. I have already bought myself a spare battery though they are really expensive. Recharging only takes 90 minutes.
I am very pleased with this drone and will be taking it on the road with me on future trips. Bookmark www.ThailandFromAbove.com to see all the pictures I have so far. Many more to come this year.

Hi, Great write up on the drone. I do have a question for you – must you have your wifi switched on on your phone while using the drone? Can you just send the drone up – take some photos and bring it back down again. ? Thanks.
WiFi enables you to communicate with the drone. The drone has its own hotspot so you connect to it with your smartphone. This has nothing to do with internet.
Hi Richard – certainly provides a different perspective for photography. Often wanted to get higher with some areas I have visited in Thailand.
How do you feel about sending your drone over water? Do you do it?
Cheers
Roo
Yes, I fly over water and also launch from boats. But yes, I am obviously nervous about it every time.
Thanks for that.
I’d love to get one.
Maybe some day.
Is there any regulatory issue with using the drone in Thailand?
First you inspired me to start juicing, and now you have inspired me to get one of these; I wonder what next?!
First flights yesterday and amazingly easy to fly. Have now upgraded to the latest camera firmware and it will now shoot DNG files. There is also a lens correction profile for Photoshop to reduce some of the distortion.
Great service from Hobby Thai. Paid one day by bank transfer and it arrived the next by EMS.
Hi Richard,
I tried to contact Hobby Thai about the drone as they don’t have them in stock.
I send emails in English and Thai but no answer.
Do you know if they and who speak English so i can call them.
My Thai is i think not good enough to call them in Thai about the drone.
Sorry, they don’t speak any English. I noticed too they are out of stock.
I dealt with Khun Kally via email at shop@hobbythai.com and his written English is OK. My Phantom camera produces images which are soft on the left hand side, and they have agreed to replace it with a new one; so I will be heading there next week. They said they have a new stock of cameras arriving on Tuesday; so maybe they will have some new Phantoms then as well.
I have since found a shop near Pattaya that sells them; but that is not of much help if you live in Bangkok!
I live in Phuket but I can buy online if they allow.
I send 2 mail to hobby Thai but did not get a response.
I’m really interested to buy one but it is difficult if they do not respond to emails.
Hi Richard,
what you do was my dream since I was a child. Now I’m 60.
I’m surprised how clear and sharp you photos are. Can I visit you when you fly your phantom? If yes, please give me the GPS-location and date. Thank you. Looking forward to it.
Here is my review of the Phantom 2 Vision, with due acknowledgements to Richard for alerting me to this amazing craft: http://www.pattayadays.com/2014/03/phantom-2-vision/
For those that don’t already know, here is how to set NAZA mode, which gives you more options on the switches:
http://www.pattayadays.com/2014/03/naza-mode-on-the-phantom-2-vision/
And how to control the camera from the transmitter rather than the smartphone:
http://www.pattayadays.com/2014/03/using-the-7th-channel-on-the-dji-phantom-2-vision/
Thanks Spike. I’m very impressed with what you are doing. I wish i had your technical knowledge. I’m always nervous with tinkering with stuff like that.
Hi Spike…..can you tell me where is the shop in pattaya?
Thanks in advance
I bought mine from Hobby Thai in Bangkok (called them up and sent them the money and they despatched to me). However I believe a shop on the ground floor of Tukcom is now selling them (the latest model is the Vision Plus).
Great write-up. I’m thinking about taking a Phantom to Thailand, but I was curious whether you had any hassles with police or other authorities about flying the Phantom there. How did local people react when they saw the Phantom flying? Any issues with flying near temples or other sacred places?
They were curious of course. I have media credentials hanging around my next most of the time so I am left alone. Just use common sense and don’t fly near military installations, prisons, palaces etc.
Hello Richard, Hi everybody, I live and work in Bangkok and just got the Phantom 2 vision +. Am busy reading the manuals and getting info on the Internet. That’s how I got here. Richard mentions a wi-fi range of 300 m, and that’s in CE mode. Does that mean one cannot use the FCC (700 m) mode in Thailand ?
Thanks
Hi Richard,
Great little blog. I have just bought a GoPro and your article has inspired me to also get a quadcopter for it! I return back to Bangkok from the UK tomorrow and I think the first thing I will be doing is heading down to Hobby Thai to pick myself one up! I live in Songkhla, down south, so should be able to get some great coastal footage 🙂
Hit me up on facebook if you like via greg_maloney@hotmail.com
Hi Richard, I have buy a phantom 2 vision + this week, unfortunately, he have syndrom FlyAway and I lose it in phutamonton parc in front of the big bouddha for my first fly !!!
All was very fine, the drone was very easy to control even though there was a slight wind. it was very stable, it did not move.
Just before the drone fly away, I was trying to position it at an altitude of 2 meters in front of me to take my picture. While I was doing it up slowly, the engines took the full power and the drone is mounted vertically and very quickly at an altitude of 50/70 meters at least.
I lost the connection with the remote control, the drone remained above me for 1 or 2 minutes and then he left very faraway.
I am in touch with Dji and Hobbythai …. we’ll see what they will do for me.
Didn’t you get GPS lock for home before you took off? If it goes out of range it will then automatically come back to home. But, sorry you lost it. A good tip for other people is to put your phone number on the drone.
yes .., all was ok but if you make a google search with the keyword “phantom vision, flyaway”, you understand …
Hi Richard,
Have a look here filmed with quad drone: https://www.facebook.com/photo.php?v=687415664645681&set=vb.671612306226017&type=2&theater
Took mine out for it’s first flight yesterday . . . see the results here:
http://www.youtube.com/watch?v=k4KJpYrlZ4g
Thanks again for the inspiration!!
P.S. Great vid of that hotel Patrick . . . I need to get practising!
Hi Richard
I ‘am going to Thailand in December.BKK,Koh Chang and Krabi (Ao Nang)
i wonder …is the any speciel rules and law i have to be aware of??
i know :Don’t fly near Airport or Military bases….
Regards
Peter
Nothing specific yet, just common sense. Included in your list should also be royal palaces and areas with large crowds.
Hi Richard, great blog !
You have been a great resource as I was first looking to get into ariel photo and video and found this channel which gave me a better idea on how to get started.
So anyway finally got out of Bangkok for the weekend and did my second flight with my DJI vision plus – location was (Bang Saen beach, Thailand) *more practice needed.
Feel free to watch here: https://www.youtube.com/watch?v=-9LUODLa-iY
Im in Pattaya, I bought phantom 2 vision plus about a month ago online from Lazada Thailand, I was 50/50 but on a Monday they had a promotion with 10% off if you pay using mastercard so I got it for 38,600 baht, since then they’ve gone up in price, but every Monday has this discount, sat and sun selected items have 15%. In tut com ground floor Pattaya the mind shop sells them about 43,000 but with a spare battery. The Bangkok options are Phantom Thailand, thaihobby.com, rc-society or twinhobby.com . Ive started a facebook group pattaya drones, only 5 members so please check it out.
Some feedback about the “official DJI dealer” in bangkok, http://www.phantomthailand.com/ ?
Hi!
Your pictures are amazing! I am travelling to Thailand in December and was wondering if there is any legislation that I should be aware of or do you fly freely?
I would love to bring my Phantom along on the trip.
Regards,
Joe
As more and more people start to fly here, we are now seeing more restrictions. For example, all public parks in Bangkok now ban drones. You shouldn’t also fly near palaces or military barracks.
Anyone have experience traveling to Thailland with the Phantom? I’m going this weekend from the US and wondering what nightmares if any to expect if I were to bring it.
I had no problem taking it to the UK last year and then back again to Thailand. I took it as carry-on. Take the batteries out and put them in a fire proof bag for the flight.
Hey Richard!
Love the photos. I think many of them are taken marvelously. With the recent restrictions on drones in Thailand, and with the need of permits. How have you gotten around that? I was thinking of buying one myself, but can’t seem to find any information on how to legally acquire permission, etc.
Any insight would be great, thanks 😀
-Loy
The law hasn’t been passed yet. We are still waiting.
Hi Richard,
Im travelling to Phuket this weekend and was planning to bring my drone there.
Since the law has yet to be passed:
1) Will I be able to take the drone into the country?
2) Would I still be able to fly around the beaches and etc. ?
You shouldn’t have a problem. But if you are flying, make sure you put your batteries in a fire proof bag.
Hi Richard,
Do you have already some news regarding the ruling of flying drones here in the Kingdom?
Best Regards,
Chris
There has been no announcement on this yet. Still waiting.
Keep us updated if anyone hear about an official ban for drones.
For sure, as it will affect me. Anyway, I am quietly confident it will be alright as I just bought a new drone!
Cool.
I just bought a DJI Phantom 2 Vision +
Very happy with it 🙂
Hi there,
What is exactly in the new law that we are supposedly waiting for? Total ban? Permits?
Anybody knows when passing or not passing such law is decided on?
I’m trying to convince the school I’m working for to buy one for my physics classes, but they, quite sensibly, asked me if this is/will be legal. I don’t know what to tell them.
Cheers!
No-one knows. Nothing has been passed by the government and no timetable has been given. Could be weeks, months if not years. But, there will be an update to the law at some point.
https://www.techinasia.com/unlicensed-drone-pilots-thailand-spend-year-jail-law/
So that has not been ruled on? The research and education permit? Where I could get one?
There is no such law at this moment in time.
Great site with good information. I’m bringing back a Syma X5sc Explorers 2 from UK to Chiang Mai, where I live. Just to learn to fly a bit ( and crash a few times ) before getting a Phantom 2 or 3. But will be a shame if the Thai law prevents people from flying in the future.
I enjoyed your little presentation. I live in Pattaya and am interested in getting a drone. Is there a cheaper model you could recommend that I might start with as I can’t really afford to buy the same model as you at this time.
Thanks
Hi Richard, I was intending to buy a Xiaomi FIMI X8 SE drone, Lazada was selling them till a week ago, now they are not. Would you happen to know where I may purchase one given your extensive contacts.
Thanks in advance.
Regards
Roo du Jardin